Stone Age Jewellery - Craft Activity for Kids
- Sep 11, 2020
- 4 min read
Updated: Mar 27, 2025
Stone Age people started making jewellery not long after they started making weaponry. Their jewellery included beads on necklaces and bracelets, pendants and hair pins. They made these beads from shells, animal teeth, animal bones or stones. They would then thread these beads onto string often made from plant stems or thin strips of animal hide. They would even sometimes decorate their jewellery by carving designs into the bead's surface.


How To Make A Stone Age Necklace
Equipment:
Mixing Bowl
Mixing Spoon
Measuring Jug
Selection of Shells (Optional)
Pen/Pencil
Wooden Skewer
Paint Brushes
Crafting Supplies/Ingredients:
125g Plain Flour
63g Fine Table Salt
60ml Water
Twine or other natural coloured string - We used Draper Garden Twine
Paint for decorating (optional) - We used Daler-Rowney 12 Acrylic Paint Set
PVA Glue/Varnish (optional) - We used Craft Planet PVA Glue
Step 1: Prepare the Salt Dough


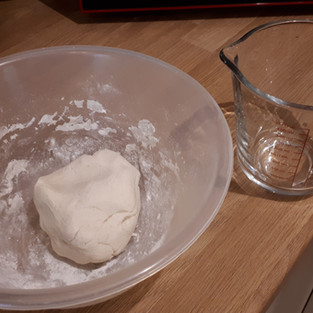
Mix together the flour and salt in the mixing bowl
Stir the water in to your flour/salt mixture – make sure to add a bit of water at a time to avoid making the mixture too sticky
Keep adding water a bit at a time until the mixture comes together to form a dough. As the dough thickens you may find it easier to kneed it with your hands rather than mixing with a spoon
Your dough should be easy to mould and shape (a bit like playdough). If your mixture is too sticky or wet, kneed in more flour to balance out to a better consistency
Step 2: Shape Your Beads
Pinch off a small lump of dough and use your fingers to shape it into your preferred bead design
If you need inspiration, check out the images of real Stone Age beads above or take a look at some of our ideas:


1. Shell Designs:
Choose a selection of shells with different patterns and textures to experiment with
Take a lump of dough and press it onto the shell’s surface
Carefully peel away the dough, making sure not to squash the pattern with your fingers

2. Teeth Designs:
Roll a lump of dough into a sausage shape
Place one end of the sausage on the worktop then shape the rest of the sausage into a cone shape with a point at the top
Experiment with different teeth sizes and shapes

3. Bone Designs:
Roll a lump of dough into a sausage shape
Squash each end of the sausage down slightly to form the wider top and bottom sections of the bone
4. Stone Designs:
Roll a lump of dough into a rough ball
Squash or mould into different stone shapes
Experiment with rough edges or smooth. Perhaps use your shells again to add texture to your stones
Step 3: Carve Your Beads


Use a pen or sharp pencil to carve line designs into your beads
Experiment with different thicknesses of lines or dots
We used swirl designs, shape patterns and basic line carvings of animals
Step 4: Add Bead Holes

Use a wooden skewer to gently push holes through your beads
If you have carved a design on your bead, remember to create the hole through the side of the bead (not the front) so that your design will face forwards when strung to the necklace
Step 5: Bake the Beads

Get an adult to heat the oven to the lowest temperature it will go to
Put your beads on a baking tray, then get an adult to pop it in the oven
Bake your beads until they harden completely – this could take about 3 hours depending on the size of your beads
Once hard, remove them from the oven and leave them to cool on a wire rack
Step 6: Decorate Your Beads (Optional)


Use neutral coloured paints (greys, whites, browns, greens, etc) to paint your beads
Make sure not to block up the holes in your beads with paint
Alternatively, leave them unpainted for a more natural effect and move on to step 7
Step 7: Seal the Salt Dough (Optional)
Once the paint is dry, coat your beads with PVA glue or varnish to seal it
Make sure not to block up the holes in your beads with glue or varnish!
Step 8: Add To Your Necklace

Thread your beads onto a length of twine long enough to go over your head
You may have to widen the holes with your skewer again if you have used paint or glue/varnish on your beads
Tie the ends of the twine together to complete your Stone Age necklace.


Here are some of the craft materials we used to create our Stone Age necklace:
The above links are affiliate links. That means if you buy something through the links above, we will earn a few quid at no extra cost to you. But it’s worth pointing out, we choose these products because we genuinely recommend them.
If you’re under the age of 16, it’s important that you get a parent or guardian’s permission before you buy anything over the internet.


